Personalized Attachments
 
 AY Mail 2. Any Edition
 Some knowledge of file systems required
It is sometimes necessary to send different attachments
to different people. If you want to do so, you need to
prepare the files to be attached and and then make a
data field that
will be pointing to the file.
Preparing data fields:
For each customer, you need to have a data field that
refers to the file name to be attached. For example,
you may have a Customer Id data field. Let us assume
we have three customers: John, Joe and
Jill, and that
they have customer IDs 123, 124 and
125 respectively.
Preparing files:
You need to put all the files that are to be sent
into the same directory, for example C:\FILES. You
need to name your files uniformly. Typically, the name of the
file should start from prefix (you do not have to
use the prefix if you do not want to) and end with
postfix (which is also optional). The postfix will
usually include the file extension. For example, if you
are sending out billing statements, you can decide to
prefix your file names with bill and use .pdf as a
postfix. If we have three customers, as stated above,
we have to create three files - bill123.pdf for John,
bill124.pdf for Joe and bill125.pdf for Jill.
Setting up the attachment:
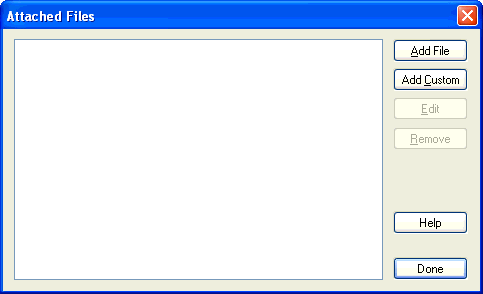
1. Click on the Message tab and then click on the
Attachments button. The Attachments dialog will appear:

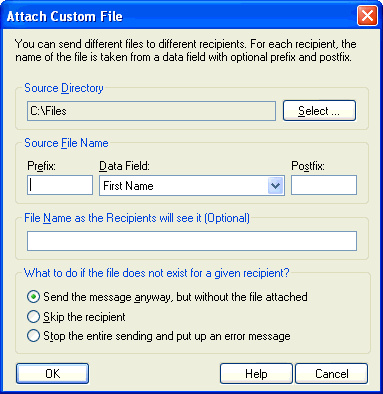
2. Click on the Add Custom button (you must have
at least one data field or the button will be
disabled). The Attach Custom
File dialog will appear:

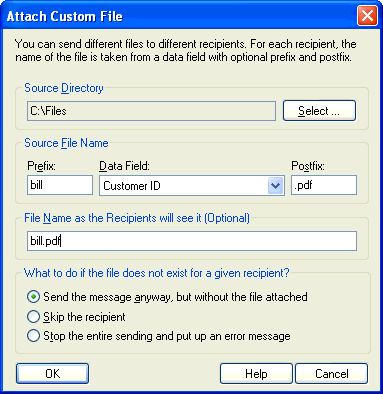
3. Select the directory where you put all your files
under Source Directory.
4. Type in the Prefix, for example "bill."
5. Select the field that contains the IDs under Data
Field.
6. Type in the Postfix, for example ".pdf."
7. Type in the general name of the file under the File Name
as the Recipients will see it, for example "bill.pdf."
It is very important to put a correct extension in here,
because this determines file type. A wrong extension will
make the file unreadable. Leave that blank if you want
real file names to be used.

8. Click on the OK button, then close the Attachments dialog
as well.
You are ready to send your bills out.
| 